A New Take on Eggs

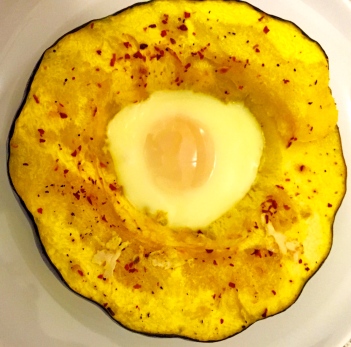
I usually spend my Sundays cooking for the week–I’ll make mounds of food that I can easily heat and eat. This Sunday I was craving eggs and wanted to try something new. That’s when I opted for Acorn Squash in A Hole and boy was I blown away. It’s light and refreshing and gives you that perfect protein, veggies, fat combo. All I can say is YUM!

FullSizeRender

What you’ll need:

1 large acorn squash
2 tsp. olive oil
3/8 tsp. kosher salt
1/4 tsp. crushed red pepper
4 large eggs
1/2 tsp. fresh thyme leaves
2 slices bacon, cooked and crumbled

First, preheat the oven to 425°. Then you’ll want to trim off about 1/2 inch from each end of squash. Once done, slice the remaining squash crosswise into 4 rounds. Make sure to remove the seeds and membrane with a spoon! Next, brush both sides of the squash with olive oil and place on a baking sheet coated with cooking spray. Next, sprinkle with salt and crushed red pepper. Finally, bake at 425° for 15 minutes or until squash is just fork tender.

Once that timer goes off, remove the baking sheet from oven and crack an egg into the center of each acorn slice; sprinkle eggs with remaining salt. Next, return the pan to oven and reduce oven temperature to 350°. Bake for 12 minutes or until eggs are cooked. Lastly, transfer to a plate and sprinkle with thyme and bacon. Enjoy!

This recipe is easy and delicious and best of all healthy! Pair it with a protein such as chicken or steak or even a handful of potato fries. You simply can’t go wrong. But until next time, Keep eating!
Hail to the Halibut!

With work being busy, I am always looking for a quick yet absolutely delicious meal that I can whip up in no time. While I am a carnivore at heart, I try and make sure to eat fish at least twice a week. I’m a big fan of halibut so when I found this recipe for Halibut with Balsamic Cherry Tomatoes, I was hooked.

Continue reading

A Remarkable Concept: Leftovers

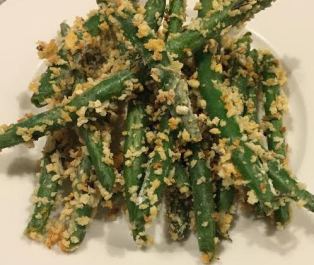
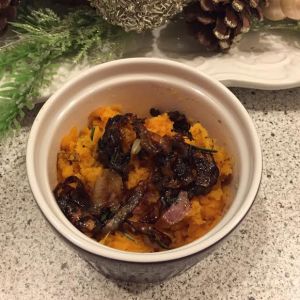
This past week marks one of the best holidays around–Thanksgiving. It’s an excuse to pig out and stuff your face, there seriously couldn’t be anything better right? You’re going to think I’m crazy but yes there is…the leftovers. Leftovers are your excuse to extend the holiday. This year I opted for not one but two next day recipes: Crispy Green Beans with Sriracha Mayo and Rosemary Mashed Sweet Potatoes with Shallots.
I decided not to make the sriracha mayo and instead eat them on their own with leftover stuffing 🙂
For the green beans you’ll need:
 unnamed-1
  • 2 1/2 c. panko
  • 2 tsp. fresh thyme leaves
  • 1 tsp. garlic powder
  • 1/2 tsp. ground red pepper
  • 1/8 tsp. kosher salt
  • 1/2 c. all-purpose flour
  • 4 egg whites
  • 1 pound leftover steamed green beans
Alright now to get started… Preheat the oven to 375°. Then get that panko out and spread it onto a baking sheet. Bake at 375° for 4 minutes or until golden brown and you see a nice crisp start to form. Then, transfer the panko to a shallow dish and let cool. Add thyme, garlic powder, pepper, and salt and toss everything until fully combined. Next, place the flour in a shallow dish and the egg whites in another. Go ahead and soak the green beans in flour, then egg whites, then the panko mixture and place on a baking sheet. Repeat that process until you’ve used all your beans. Lastly, bake those green beans at 375° for 8 minutes or until they become nice and crispy. There you have it, one side down, one more to go!
unnamedFor the Rosemary Mashed Sweet Potatoes you’ll need:
  • 5 1/2 tsp. extra-virgin olive oil
  • 2 medium thinly sliced shallots
  • 1 1/2 tsp. brown sugar
  • 1 1/3 lbs. sweet potatoes (I used a single microwave sweet potato as I was about to eat my left foot out of hunger!)
  • 2 tsp. finely chopped fresh rosemary
  • 1/4 tsp. coarse sea salt
  • 1/4 tsp. black pepper

Now get that pan out and get cooking! Heat oil in a medium skillet over low. Then, add the shallots and cook for roughly 5 minutes. After that 5 minutes has passed, you’ll want to sprinkle with the brown sugar and cook for about 20 minutes or until shallots are golden (mine didn’t take this long, you’ll just have to gauge this step based on your stove type). Then I heated up my sweet potato in the microwave. Once it was done I let it cool, removed the skin and cut into chunks to make it more ‘mashable.’ I added the rosemary, salt, and pepper and combined and smashed everything together. Serve that creamy mashed potato goodness with a drizzle of olive oil and top with your incredible shallot mixture.

Voila! There you have it–Thanksgiving day 2. All you need to do is add some turkey, slap some gravy on that plate and give yourself permission to dig in–I certainly know I did! But until next time (or next year for this holiday), keep eating!

‘Tis the Season…For Pumpkin!

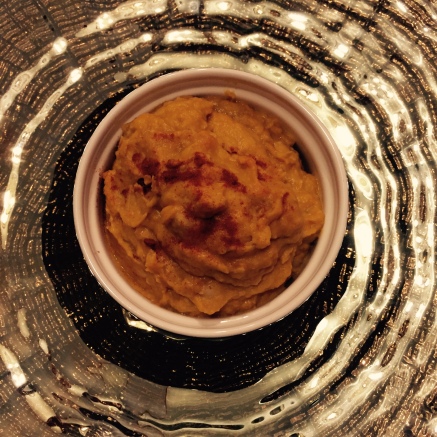
One thing to know about me is that I absolutely adore (that’s even an understatement) pumpkin, which is what makes fall one of my favorite seasons. I incorporate it into every aspect of my diet, whether it’s in the form of pumpkin pie, pumpkin soup, pumpkin spice lattes, OR this White Bean and Pumpkin Hummus.
If you’re a hummus lover, you need to get on this. It’s light yet smoky and packs a punch. The paprika really gives this dish an incredible smoky flavor, leaving you coming back for more.
FullSizeRender
For this hummus you’ll need:
  • 1 c. canned pumpkin puree
  • 2 tbsp. tahini
  • 2 1/2 tbsp. fresh lemon juice
  • 1 tbsp. olive oil
  • 1 tsp. ground cumin
  • 1 tsp. smoked paprika (this ingredient really brings the hummus to life!)
  • 1/8 tsp. salt
  • 1 15oz. can cannellini beans
  • 2 garlic cloves
Once you’ve rounded up all the ingredients, whip out that food processor and add in everything. Simply, process until smooth. Done and done. How easy was that? This is the perfect fall spread for just about anything. It’s great with homemade pita chips, carrots, crackers, you name it. (Side note: I’ve already dug into the second batch I made.) If you’re a pumpkin lover such as myself, you MUST test this out. But until next time, keep eating!

Warm Weather Eats

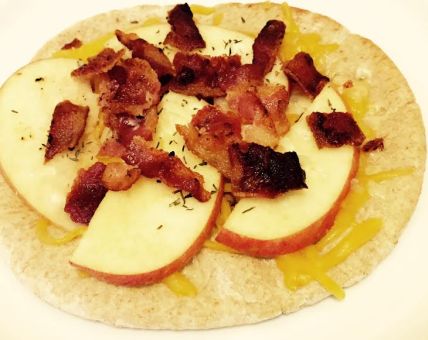
We all know that when the weather gets cold, out come the comfy sweaters, insane amounts of hot chocolate, and fluffy socks. Well that was my weekend to a T (except instead of hot chocolate I chose a warm apple and bacon pizza–boy was that a good choice).If you’re ever stumped on deciding what to eat, go with pizza (can’t you tell by the numb of my posts revolve around pizza???). This Apple and Bacon Pita Pizza was the perfect amount of cheesy and crispy goodness. And wait did I mention it was covered in bacon? Oh yeah, that happened.
All you’ll need is:
  • 4 whole wheat pitas
  • 2 tsp. olive oil
  • 1/2 c. shredded cheddar cheese
  • 2 c. thinly sliced Fuji apple
  • 3 tbsp. grated Parmesan
  • 2 tbsp. chopped walnuts
  • 1 tsp. fresh thyme
  • 2 slices of applewood-smoked bacon (chopped and and cooked)
Once you have all your ingredients, let the pizza making begin! Start by pre-heating your broiler to high. Broil those pitas until they are lightly golden (about 1 min.). Once done, remove, flip, and brush with olive oil. Then sprinkle the shredded cheddar over the pitas and arrange the apple slices. After you’ve beautifully arranged your apple slices, sprinkle the Parmesan cheese, walnuts, thyme and bacon on top. Return your pizza to the oven and broil for another 1-2 min. As soon as those few minutes are up–take that sucker out and enjoy!
unnamed
Trust me, you’ll be using the size of the pita as an excuse to wolf down another one. What I love is that you can put any sort of toppings you want atop a pita–I think my next combo will involve pesto, mozzarella and prosciutto, but hey that’s just me thinking out loud 🙂 Perfect for a cold day in bed–test them out and let me know what toppings you decided to try. But until next time, keep eating!

When The Moon Hits Your Eye Like a Big Pizza Pie, That’s Amore

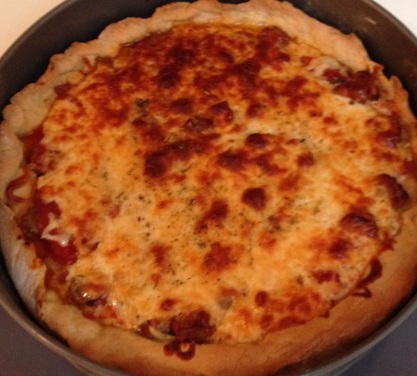
Pizza, pizza, pizza, is there anything better? There are so many different kinds, it’s hard to pick just one! While my love affair continues to grow everyday, I am sad to say I’ve never had deep dish pizza…I decided to change that and make my own with Cooking Light’s Deep Dish Mushroom and Onion Pizza.
Deep Dish PizzaFor your deep dish pizza, you’ll need:

  • 1 1/4 tsp. dry yeast
  • 1/2 tsp. sugar
  • 3/4 c. warm water
  • 5 tbsp. olive oil
  • 9 oz. all-purpose flour, divided (about 2 cups)
  • 1/4 c. semolina flour
  • 3/8 tsp. salt
  • 1 1/2 c. thinly sliced onion 
  • 1 tbsp. minced garlic
  • 1/2 tsp. dried oregano
  • 1/4 tsp. salt, divided
  • 1/4 tsp. freshly ground black pepper
  • 1 (8-oz.) package sliced mushrooms
  • 3/4 c. lower-sodium marinara sauce
  • 1 bay leaf
  • 1 oz. Parmesan cheese, grated
  • 5 oz part-skim mozzarella cheese, shredded
Making dough is not necessarily an easy task but I was definitely up to the challenge. First, you’ll want to dissolve the yeast and sugar in about 3/4 c. of warm water in the bowl of a stand mixer and let stand for five minutes. Next, add 3 tbsp. olive oil. Next, lightly spoon about 1 3/4 cups of all-purpose flour into measuring cups and level. Then add the semolina flour and 3/8 tsp. salt to the yeast mixture. Then you’ll want to mix at medium-low speed with a dough hook until smooth. Next, turn dough out onto a lightly floured surface and knead until smooth and elastic. Gradually add remaining 1/4 c. flour. Then, place dough in a large bowl coated with cooking spray and make sure you turn to coat the top. Finally, cover and let rise in a warm place for about 1 1/2 hours or until the dough is doubled in size. Once your dough has risen, heat 1 tsp. of olive oil in a large skillet over medium-high heat. Next, add the onion and cook until tender. Then, stir in garlic and cook for 30 seconds, stirring constantly. Then add oregano, 1/8 tsp. salt, pepper, and mushrooms and cook for six minutes. After that’s finished cooking, combine remaining salt, marinara, and bay leaf in a saucepan and bring to a boil. Then, reduce heat, and simmer 5 minutes–once done, throw away the bay leaf!
Almost there! Then, preheat oven to 425°. Coat the bottom and sides of a 10-inch spring form pan with 1 tablespoon oil. Then you’ll punch the dough down (this is fun!) and turn dough out onto a lightly floured surface. Carefully lift dough and place in the greased pan. Press dough into bottom and halfway up sides of pan. Then, sprinkle Parmesan evenly over dough and top with mushroom mixture, then spreading the marinara mixture over the mushrooms. Finally, sprinkle with mozzarella and bake at 425° for 28 minutes or until crust and cheese are browned. Let is stand (if you can resist!), then serve!
I do have to say this pizza turned out pretty darn good and is a great substitute if you can’t make it to Chicago for some REAL deep-dish pizza (that’s on my bucket list!). You can spice this up any way you like–throw some pepperoni or sausage on top and pick your favorite vegetables to bake inside–the options are endless. But until next time, keep eating!

The Ultimate Throwback

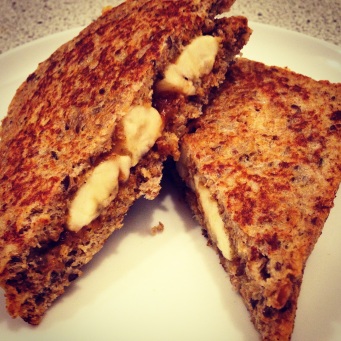
Throwing back to my childhood with a twist to a classic favorite: banana-almond butter french toast sandwiches from Cooking Light.
Banana French Toast Sandwich
For this delicious masterpiece, you’ll need:
  • 2 large eggs
  • 1/4 c. unsweetened almond milk
  • 2 tsp. vanilla extract
  • 1/4 tsp. ground cinnamon
  • 2 tsp. almond butter
  • 4 tsp. maple syrup
  • 1 banana
  • 4 slices multigrain bread
  • Cooking spray
First, crack the eggs into a shallow bowl and add almond milk, vanilla extract, and cinnamon; Once added, stir with a whisk to combine. Then, combine the almond butter and maple syrup in a small bowl. Next, cut the banana lengthwise into 4 thin slices, then cut crosswise into halves. Then you’ll want to spread the almond butter mixture evenly across the bread slices. Top two of the bread slices with the banana. Heat a panini press to high heat (I used a frying pan as I sadly don’t have a panini press!). Then, dip the sandwiches into the egg mixture, letting the excess drip off. Lightly coat grill plates of panini press with cooking spray and arrange sandwiches on press. Cook 3 to 4 minutes or until sandwiches are browned on the outside and hot in the center (side note–if you’re using a frying pan like I did press each side down with a spatula to get that browning effect). Serve this magical creation hot and enjoy!
I couldn’t wait to dig into this ooey-gooey yumminess, I was smiling the whole time I ate it. I highly recommend these sandwiches if you need a pick-me-up–they certainly do the trick, but until next time, keep eating!

A Farewell to Summer

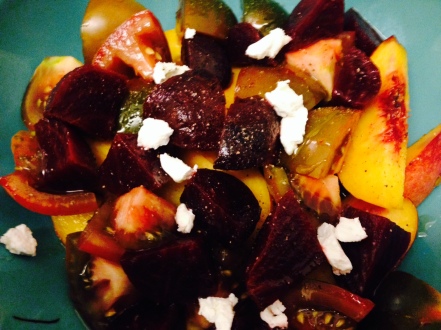
Since the salsa in my previous post was such a hit, I had to keep up the ‘wow’ factor for my second course. With that said, I chose this colorful and delicious Peach Salad with Tomatoes and Beets from Cooking Light. I wanted to stick with the light and fruity theme and this was the perfect choice!
 
Beets are unique in that you have to bake them until tender so their skin falls off. It’s a little more labor-intensive that other vegetables but SO worth it (and they WILL stain your fingers!) If you haven’t baked beets you should absolutely try it–it’s one of those good basic cooking techniques.
 
Peach, Beet, Tomato Salad
For this recipe you’ll need:
  • 2 medium-sized beets
  • 2 medium-sized ripe tomatoes
  • 3/4 tsp. salt
  • 1/2 tsp. ground black pepper 
  • 3 tbsp. olive oil 
  • 2 tbsp. lemon juice
  • 1 tbsp. honey 
  • 1 medium shallot, thinly sliced
  • 3 medium peeled peaches, sliced 
  • 3 tbsp. small fresh mint leaves
  • 2 tsp. fresh thyme leaves
  • 2 oz. goat cheese (about 1/2 c.)
First, you’ll want to preheat oven to 425. Scrub, trim and place the beets in a glass or ceramic baking dish and fill the dish about one-third full with water. Next, cover with foil and bake for 1 hour or until beets are tender–make sure to let them cool once done (they’ll be extremely hot!). Finally, peel the beets and cut into slices. For the next part of the salad, you’ll want to core the tomatoes and cut into slices. Then, arrange the beet and tomato slices on a platter and sprinkle with salt and pepper. For the dressing, combine salt, oil, 1 tbsp. lemon juice, honey, and shallot in a medium bowl. Then toss the peach slices with remaining lemon juice. One last step! Combine the beet and peach mixture with honey mixture and toss. To top itall off, sprinkle the salad with the mint, thyme, and goat cheese. Now that’s what I call a salad!
 
It’s colorful, scrumptious and makes for a magnificent second course! I seriously encourage you to try it, you won’t be disappointed! But until next time, keep eating!

Speedy Summer Salsa

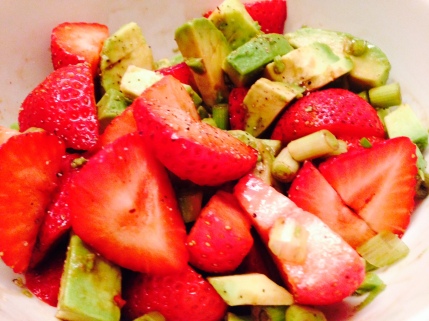
In honor of the last day of summer, I decided there was no better way than to go all out and make a feast. To start, I made Cooking Light’s Chunky Strawberry-Avocado Salsa. It’s light and refreshing and pairs fabulously with some crunchy corn tortillas chips. And bonus….it’s easy!
 
Chunky Strawberry Avocado SalsaChunky Strawberry Avocado Salsa
You’ll need:
  • 1 1/2 c. quartered strawberries
  • 2/3 c. chopped radish
  • 1/2 c. chopped green onions
  • 1 tbsp. balsamic vinegar
  • 1/4 tsp. salt
  • 1 diced ripe avocado
Combine all ingredients in a bowl and serve! The fruity-ness of the salsa paired wonderfully with champagne and raspberries too. All-in-all this was the perfect start to the last summer meal! What’s great is that you can really get creative with this salsa by adding additional ingredients, let me know how you served this salsa. But until next time, keep eating!

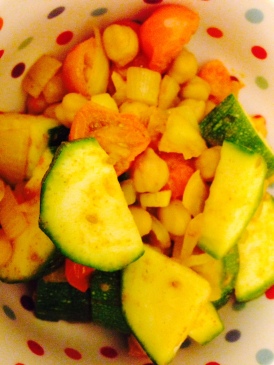
Tasty, Tantalizing Tagine

I’m always in search for dishes packed with exotic spices and flavors–a simple spice can transform any dish. You can go from basic to something that really packs a punch in seconds!
 
What I love about Cooking Light’s Chickpea and Vegetable Tagine is that it combines spices that are all bold in their own way but work wonderful together. You start with a basic base, in this case quinoa, chickpeas, and zucchini, and dress it up–all it takes is a teaspoon of a certain spice.
 
tagineFor this recipe you’ll need:
  • 1 cup water 
  • 3/4 c. uncooked quinoa, rinsed and drained
  • 1/2 tsp. salt
  • 1 tbsp. extra-virgin olive oil 
  • 1 1/2 c. chopped onion 
  • 1 tsp. ground cumin
  • 1 tsp. ground coriander
  • 1/2 tsp. ground cinnamon 
  • 1/2 tsp. turmeric
  • 4 garlic cloves, chopped
  • 3 cups Sun Gold or cherry tomatoes, halved
  • 1 (15-ounce) can unsalted chickpeas, rinsed and drained
  • 1 medium zucchini, halved lengthwise and thinly sliced 
  • 1/4 tsp.freshly ground black pepper
Start by bringing 1 cup water, quinoa, and 1/4 teaspoon salt to a boil in a small saucepan over medium-high heat. Then, cover, reduce heat, and simmer 13 minutes or until liquid is absorbed. Next, heat a large saucepan over medium-high heat. Add oil; swirl to coat. Add onion to pan; sauté 4 minutes. Add cumin, coriander, cinnamon, turmeric, and garlic; cook 1 minute, stirring constantly. Add tomatoes; cook 2 minutes or until tomatoes begin to release their liquid. Add chickpeas and zucchini. Cover, reduce heat to medium, and cook 5 minutes. Stir in remaining 1/4 teaspoon salt and pepper. Top the quinoa with the zucchini mixture and enjoy!
 
You can choose any vegetable you want for this dish as well as any base–try it with another grain such as brown rice or bulgar. You could even throw some spinach in there for that extra ‘green’ punch. I suggest checking out your local farmer’s market and pick a vegetable that catches your eye. Test it out and let me know what you think, but until next time, keep eating!